
Views: 0 Author: Site Editor Publish Time: 2026-07-09 Origin: Site
Improper wall mounting carries surprisingly high stakes. A failed installation leads to severely damaged drywall, shattered expensive decor, and sudden safety hazards in your living space. We understand the frustration of watching a carefully hung mirror crash onto the floor. Upgrading to a Nylon Anchor offers massive improvements over cheap, brittle plastic alternatives. However, its ultimate reliability depends entirely on precise sizing and correct installation technique. Quality materials alone cannot save a poorly executed mounting job.
This guide provides a foolproof standard operating procedure for a flawless installation. We will help you evaluate your specific wall material accurately. You will learn how to select the exact tools required for the task. We will walk you through the precise steps to install your hardware correctly. Following these steps prevents you from stripping or blowing out the drywall.
Every mounting project requires clear success criteria before you begin. A successful installation means achieving zero wall sag over time. It also means guaranteeing long-term stability under dynamic loads. We must differentiate between static loads and dynamic loads. A static picture frame hangs quietly on the wall. A towel rack experiences constant tugging and pulling. Dynamic loads demand much tighter installation tolerances. You must assess the environment where your fixture will live.
Modern homes typically use either 1/2-inch or 5/8-inch thick drywall panels. Expansion hardware performs exceptionally well in these materials. Ribbed designs grip the paper backing firmly. They expand behind the gypsum core to lock firmly into place. Older homes often feature lath-and-plaster walls. Plaster crumbles very easily during drilling. Standard expansion hardware frequently fails in plaster construction. Dense masonry requires entirely different hardware altogether. Specialized masonry shields provide much safer alternatives for brick or concrete.
We created a simple comparison table to illustrate hardware suitability across different wall materials. Review this before you make your final selection.
| Wall Material | Standard Thickness | Nylon Hardware Suitability | Best Alternative Hardware |
|---|---|---|---|
| Standard Drywall | 1/2 inch | Excellent | N/A (Ideal use case) |
| Fire-Rated Drywall | 5/8 inch | Excellent | N/A (Ideal use case) |
| Lath and Plaster | Variable | Poor (Prone to crumbling) | Toggle Bolts / Molly Bolts |
| Solid Masonry | Thick | Marginal | Lead Shields / Tapcon Screws |
Understanding physical force determines your project's safety. Gravity naturally pulls objects downward. Engineers call this downward pressure "shear force." A sturdy Nylon Anchor handles shear force beautifully. The hardware rests securely against the rigid drywall edge. Outward pulling force behaves entirely differently. Engineers call this "pull-out force." A cantilevered television mount pulls outward away from the wall. This action attempts to rip the hardware through the paper face. Never use standard expansion hardware for ceiling mounts. Ceilings experience pure pull-out force. Stick to heavy-duty toggle bolts for any overhead installations.
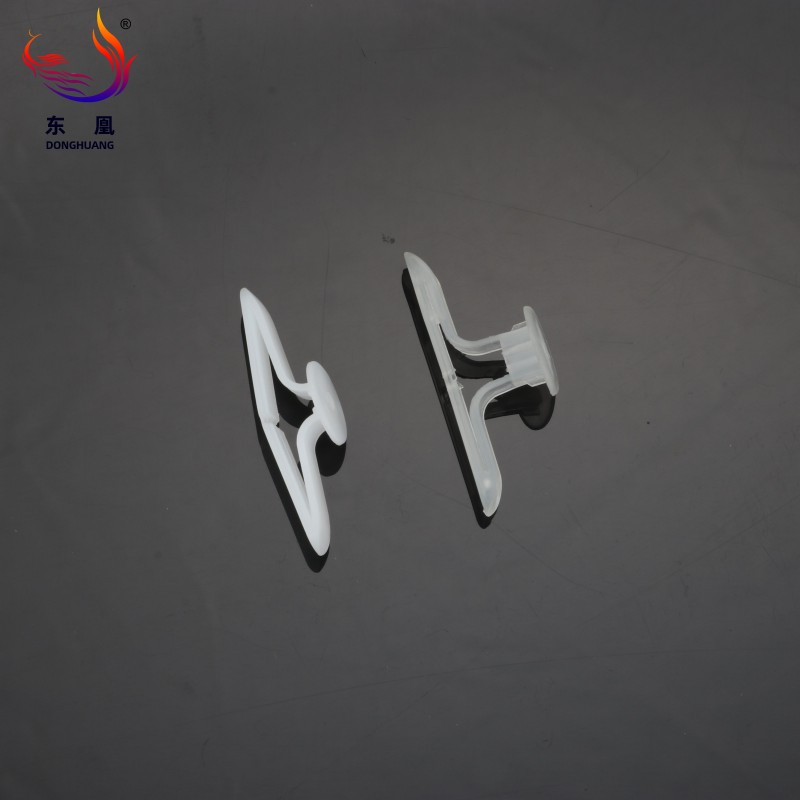
Gathering the proper equipment ensures a smooth workflow. Skipping necessary tools often leads to sloppy installations and damaged walls. You need a few fundamental items to execute this job correctly.
Precision sizing represents a critical best practice in structural mounting. You must learn how to read the packaging correctly. Hardware packaging usually displays a specific gauge number. For example, a #8 identifier requires a matching #8 screw. It also dictates a specific drill bit diameter. Usually, a #8 size corresponds to a 3/16-inch drill bit. Mismatching these elements guarantees instant failure.
We designed the following sizing chart to help you match your hardware components accurately. Use this chart as your primary reference guide.
| Hardware Gauge Size | Matching Screw Size | Required Drill Bit Size | Maximum Shear Load |
|---|---|---|---|
| #4 to #6 | #4, #5, #6 | 5/32 inch | 10 lbs |
| #8 | #8 | 3/16 inch | 15 lbs |
| #10 | #10 | 1/4 inch | 20 lbs |
| #12 to #14 | #12, #14 | 5/16 inch | 30 lbs |
You must actively avoid the "wobble effect" during drilling. Many amateur installers tilt the drill slightly. They move their hands off-axis while the bit spins. This subtle movement creates an oval hole instead of a perfect cylinder. An oval hole prevents uniform friction. Using a bit slightly too large remains the number one cause of hardware failure.
Always recommend using a manual hand screwdriver to drive your final screw. Impact drivers operate aggressively. They easily over-torque the metal fastener. Fast-spinning drivers will rapidly strip the delicate internal threads inside the cavity. They can also spin the entire assembly, destroying the surrounding drywall paper. Manual screwdrivers give you total sensory control. You can feel the exact moment the legs expand fully.
Following a strict sequence eliminates guesswork. We developed this four-step standard operating procedure for maximum reliability. Treat these steps as a mandatory checklist for every installation.
Start by measuring your desired location carefully. Mark the exact spot using a pencil. Grab your electronic stud finder next. Sweep the area thoroughly. You might hit a solid wooden stud. If you find a stud, abandon the expansion hardware entirely. Drive a standard wood screw directly into the timber. If the cavity is empty, prepare your drill. Hold your drill perfectly perpendicular to the wall. Squeeze the trigger slowly. Drill a clean, straight pilot hole straight through the gypsum core.
People skip this highly practical step constantly. A freshly drilled hole contains significant amounts of fine gypsum powder. This dust acts as a smooth dry lubricant. It coats the interior edges of the hole. Your hardware relies on friction to stay secure. The anti-rotation fins need to grip the rough paper backing. Blow gently into the hole to remove the loose powder. You can also use a small vacuum nozzle. Removing this dust ensures the ribs bite aggressively into the wall.
Insert the pointed end of your hardware into the clean hole. Push it inward using your thumb. It should feel snug. Grab your rubber mallet. You can also use the heavy plastic handle of your screwdriver. Deliver gentle, measured taps to the hardware head. Drive it inward until the outer collar sits strictly flush against the wall. Do not smash it aggressively. Smashing bends the plastic. A bent shaft ruins the internal channel for the incoming screw.
Insert your metal screw through your mounting bracket. Guide the screw tip into the flush hardware collar. Grab your manual screwdriver. Begin turning the screw clockwise at a steady pace. You will feel the mechanics working inside the wall. As the screw travels deeper, it forces the bifurcated legs to spread apart. These legs press outward aggressively against the hole walls. They might also expand completely behind the drywall panel. Stop turning the screwdriver the exact moment you feel sharp resistance. Over-tightening reverses all your hard work.
Even meticulous installers encounter occasional setbacks. Recognizing the symptoms of a failing installation saves your walls from further damage. We compiled the most common issues you might face. These practical solutions will get your project back on track immediately.
Sometimes you turn the screwdriver, but the entire assembly simply rotates. The hole is definitely too large. You likely wobbled the drill bit earlier. Stop turning immediately. Pull the hardware out of the wall. Wrap the outer ridges in a single tight layer of masking tape. This adds just enough friction to grip the hole. Alternatively, size up your hardware. Drill the hole slightly wider to accept the next diameter size up.
You tap the head with a mallet, but the shaft crumples instantly. The pilot hole is simply too small. You might have also hit a hard obstruction behind the wall. Perhaps you struck a hidden metal nail plate. Pull the damaged piece out immediately. Clear the hole completely. Use a thin wire to verify the cavity depth. Ensure you have adequate hollow space before inserting a fresh replacement piece.
You spin the screw continuously, but it never tightens. The screw gauge is too small for the internal cavity. The threads are barely grazing the inner walls. They cannot force the legs to expand properly. Pull the screw out. Refer back to the manufacturer's sizing chart. Match your screw-to-anchor ratio precisely. Swap your current screw for a thicker gauge to ensure proper internal expansion.
Every fixture has a lifecycle. Eventually, you will need to redesign your room. You might move a mirror or take down an old shelving unit. Leaving empty plastic rings in your living room looks terrible. You must manage the lifecycle of your hardware properly. Safely removing them requires a gentle approach. Ripping them out aggressively tears away huge chunks of paper facing.
This method works best for standard ribbed designs without deeply flared expansion wings. Take a slightly oversized screw. Thread it just two or three turns into the empty cavity. You only want the threads to catch the plastic lip lightly. Grab the exposed screw head firmly with a pair of pliers. Wiggle the pliers gently side to side. Pull straight back toward your body. The hardware should slide out relatively smoothly.
Sometimes the hardware expands too aggressively behind the panel. Pulling it out will definitely rip a massive hole in your wall. You must use the push-through method instead. Place the tip of a Phillips screwdriver directly over the empty collar head. Tap the back of the screwdriver handle with your mallet. Drive the entire piece completely through the panel. It will fall harmlessly into the dark wall cavity. This leaves a perfectly clean, round hole behind.
Your wall now has an empty hole requiring immediate attention. We recommend following a quick repair sequence to restore your wall perfectly.
Properly installed hardware transforms a stressful project into a secure, permanent fixture. A high-quality Nylon Anchor remains a highly reliable, cost-effective solution for medium-duty household and commercial tasks. It performs flawlessly when sized correctly and seated flush against the panel. Your attention to detail prevents catastrophic failures and protects your property.
Your next step is straightforward. Verify the total weight of your new fixture. Check your wall material by tapping it gently. Discard the cheap, generic plastic hardware included inside flat-pack furniture boxes. Invest in a dedicated, clearly labeled kit to guarantee maximum safety and long-term stability.
A: No. Once a nylon anchor expands and bears weight, its structural integrity is compromised. The bifurcated legs stretch permanently. The anti-rotation fins flatten out under pressure. Reusing it drastically reduces friction and load capacity. Always use a fresh anchor for a new installation.
A: While self-drilling (threaded) nylon anchors are designed to pierce drywall directly, creating a tiny pilot hole with an awl ensures perfect placement. It provides a guide track for the sharp tip. This extra step prevents the anchor from "walking" across the wall and scratching your fresh paint.
A: In standard 1/2-inch drywall, a #8 nylon anchor typically holds between 15 to 20 lbs in a shear (downward) load. Pull-out capacity remains significantly lower. Always consult the specific manufacturer's rating, as design variations deeply impact the ultimate holding capacity.

