
Views: 0 Author: Site Editor Publish Time: 2026-07-04 Origin: Site
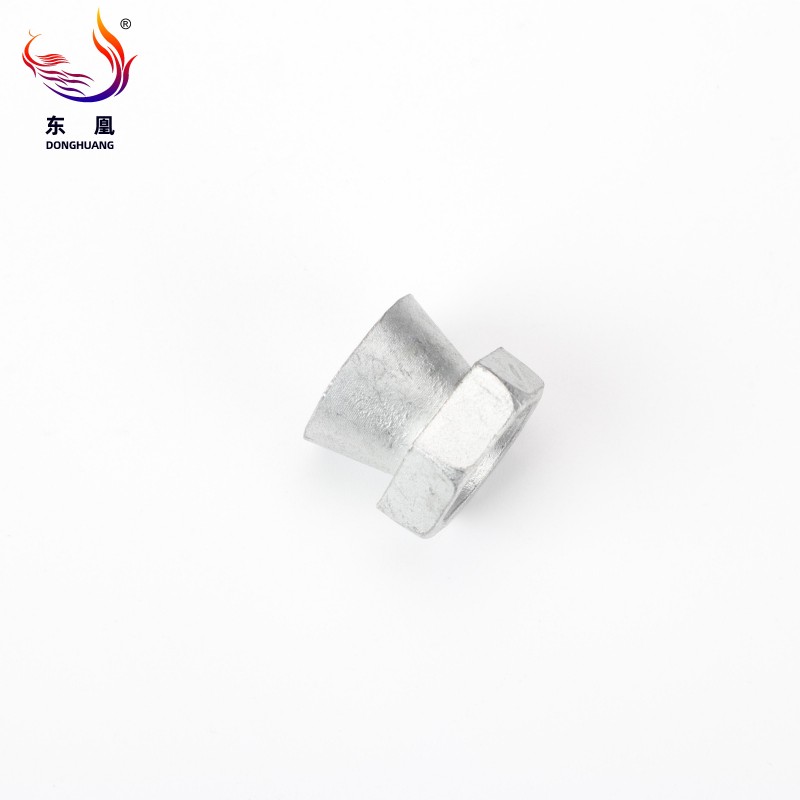
Standard fasteners usually offer an easy way out. You simply turn a wrench, and they release. However, a Shear Nut is explicitly engineered to be permanent. During installation, its hexagonal drive head snaps off at a predetermined torque limit. It leaves behind a smooth, tamper-proof conical base. This specific design actively defies standard wrenches and sockets.
Legitimate maintenance, component failure, or system upgrades often demand their extraction. Because manufacturers provide no standard reversal process, extraction becomes inherently destructive. Your primary objective changes from saving the fastener to extracting it safely. You must protect the underlying threaded stud, preserve surrounding components, and maintain overall structural integrity.
This guide details the most reliable extraction methods available today. We evaluate required tooling, analyze associated risks, and identify the best-use cases for each distinct approach. You will learn how to overcome these high-security fasteners without compromising your valuable underlying assets.
To successfully defeat a security fastener, you first need to understand its physical properties. Engineers design these components specifically to frustrate removal attempts. Every physical feature works against traditional mechanical extraction.
The installation process relies on a breakaway head mechanism. The fastener features a deliberate weak point machined into its neck. As you tighten the hexagonal drive head, rotational torque builds up. Once the designated torque limit is reached, the hex portion shears off completely. This violent break leaves only a tamper-resistant conical body behind. The resulting shape offers zero flat edges for conventional tools to grab.
Mechanics often reach for standard locking pliers or pipe wrenches first. These tools almost always fail. Traditional jaws require parallel surfaces to establish a firm mechanical bite. The smooth, conical shape of the remaining base actively deflects clamping force. As you apply squeezing pressure, the angled sides force the clamping jaws to slip upward. The tool slides completely off the fastener. Excessive clamping attempts usually just chew up the outer surface.
High-security installations rarely rely on mechanical tension alone. Technicians frequently apply industrial thread-locking fluids before installation. High-strength variants create a dense chemical adhesion between the threads. This chemical bond requires immense breakaway torque to shatter. Sometimes, breaking this bond requires localized heat exceeding 500 degrees Fahrenheit. The combination of a frictionless cone and heavy-duty chemical adhesion makes removal exceptionally difficult.
Jumping straight into destructive extraction usually leads to costly mistakes. You must evaluate the working environment first. A careful assessment prevents collateral damage and saves hours of frustrating labor. Below is a strategic breakdown of crucial pre-removal factors.
You must define your success criteria clearly. Must the threaded stud survive the process? If you plan to replace an entire fence panel or lock housing, aggressive destruction works best. Time is money. Grinding through the entire bolt assembly might take two minutes. Painstakingly saving the stud might take thirty minutes. Let your replacement strategy dictate your removal aggression.
Your physical environment dictates tool selection heavily. Open-air environments like security gates offer excellent clearance. You can swing hammers or wield bulky angle grinders easily. Conversely, automotive steering columns present highly restrictive environments. You cannot fit heavy machinery into tight dashboard cavities. Narrow spaces force you to abandon large power tools and rely on compact, precision hand tools.
Evaluate your available equipment before starting. Basic methods only require hand tools, but complex scenarios demand specialized gear. Consider the following tool categories:
Aggressive removal methods generate significant heat, sparks, and metal shrapnel. You must address fire risks immediately. Using torches near automotive fuel lines invites disaster. Sparks from angle grinders can ruin adjacent painted architectural surfaces. Welding inside vehicle interiors risks melting crucial wiring harnesses. Always deploy fire blankets, wear proper eye protection, and keep extinguishers nearby.
To help you choose the best technique, reference this decision-making chart:
| Method | Best Use Case | Tool Required | Risk of Stud Damage |
|---|---|---|---|
| Impact (Chisel) | Tight spaces, low torque | Hammer, Cold Chisel | Low to Moderate |
| Rotary Extraction (Slot) | Accessible areas, precision | Grinder, Cut-off Wheel | Moderate |
| Thermal Shock (Weld) | Heavily seized, high torque | MIG Welder, Hex Nut | Low |
| Drill & Extract | Flush-mounted, stripped | Drill, Cobalt Bits, Extractor | High |
Once you complete your evaluation, you can execute the removal. The following methods represent the most reliable industry practices. Follow the steps carefully to ensure safe extraction.
Best for: Tight spaces, automotive applications, and low-to-medium torque installations.
Execution:
Pros & Cons: This technique boasts a very low tooling cost. It presents minimal fire risk since no sparks or excessive heat generate. However, it requires enough physical clearance to swing a hammer effectively. It also carries a moderate risk of the chisel slipping. A slipped tool can deeply gouge the surrounding base metal.
Best for: Accessible areas where precision is necessary, and torque isn't excessively high.
Execution:
Pros & Cons: This process remains highly predictable. You create your own mechanical grip. Unfortunately, standard screwdrivers may not provide enough rotational leverage for heavily seized installations. You also face a distinct risk of cutting into the host stud threads. Plunging the cutting wheel too deep ruins the underlying bolt completely.
Best for: Severely seized assemblies, heavy machinery, automotive chassis, and situations demanding stud preservation.
Execution:
Pros & Cons: Welding provides an extremely high success rate. The intense, localized heat actively breaks down chemical thread-lockers and heavy rust scale. However, this method requires professional welding equipment. You must enforce strict fire-safety protocols to prevent peripheral damage.
Best for: Flush-mounted applications or when all external grip methods have completely failed.
Execution:
Pros & Cons: Consider this the method of last resort. You face a severe risk of drilling off-center. An off-center hole instantly destroys the host threads. The process demands expensive cobalt drill bits because standard bits simply melt against hardened security steel. If the extractor snaps inside the hole, removal becomes nearly impossible.
Different industries present unique operational hurdles. A technique that works flawlessly on a construction site might cause catastrophic damage inside a vehicle cabin. Context matters immensely.
When working on perimeter security, scalability becomes your primary focus. Removing one damaged panel might require extracting dozens of security fasteners. Delicately chiseling each one wastes massive amounts of labor. In these environments, angle grinders reign supreme. Technicians often find it much more cost-effective to cut the bolt entirely from the back side. You sacrifice the bolt, but you save hours of labor. Fencing hardware is cheap; your time is not. Slicing through the rear shank drops the entire assembly in seconds.
Automotive extraction demands extreme precision. Ignition lock cylinders and steering column locks utilize breakaway bolts heavily. These components usually sit recessed inside fragile, cast aluminum housings. You cannot use aggressive heat here. Emphasize the chisel method or precision slotting instead. A careless welding spark will instantly melt adjacent wiring harnesses. Heavy grinding vibrations can easily crack the fragile cast steering column. Patience and tiny, controlled impacts yield the best automotive results.
Extracting the stubborn fastener only completes half the job. You must prepare the assembly for a new installation. Proper finishing steps ensure your equipment remains secure and functional.
Before installing replacement parts, you must verify the health of the underlying stud. Destructive extraction often leaves tiny metal burrs or warped threads behind. Take time to clean the area thoroughly. Use a proper tap or die set to chase the threads. Chasing realigns minor thread damage and clears out old chemical adhesives. A smooth, clean thread path prevents the new fastener from cross-threading or jamming prematurely.
Decision-makers sometimes opt for convenience over security during reassembly. They replace the extracted component with a standard nylon-insert locknut. This choice fundamentally voids the original tamper-proof specification. If an asset required high security initially, it still requires it today. Using standard hex nuts compromises the entire system. You must maintain the engineered security baseline to prevent unauthorized access later.
Sourcing the correct replacement parts requires attention to detail. You need guidelines on matching several critical factors. First, verify the exact thread pitch. Second, match the material grade perfectly. Mixing galvanized steel with A2 or A4 stainless steel invites galvanic corrosion. Finally, confirm the specific shear-torque rating. The new installation must snap off at the exact same tension to provide adequate clamping force without crushing the underlying materials.
A: No. The initial installation process permanently removes the hexagonal drive head. Furthermore, the extraction process inevitably damages the remaining conical base. A brand new fastener is always required to re-secure the assembly properly.
A: Yes. Localized heat is highly effective at neutralizing high-strength thread-locking compounds. It also expands the metal to break stubborn rust bonds. However, heat must be carefully managed to avoid altering the temper of surrounding metals or igniting nearby materials.
A: While friction-grip sockets exist, they often fail on these specific components. The smooth, conical shape provides insufficient vertical surface area. The reverse spiral flutes inside the socket simply cannot bite into the angled metal effectively.
A: If preserving the underlying threaded stud is unnecessary, using an angle grinder is best. Equip a metal cut-off wheel and slice completely through the nut and bolt simultaneously. This remains the fastest and most decisive method available.

