Views: 0 Author: Site Editor Publish Time: 2025-11-21 Origin: Site
Nothing stalls a repair project faster than a stripped thread or a missing fastener. You stand in the hardware aisle, staring at a wall of small metal parts, trying to guess if you need a #10 or a 1/4-inch fastener. This "visual estimation" method is the primary cause of damaged equipment and wasted time. Unlike wood screws, which can often force their way into a material, a machine screw requires precise mechanical compatibility. Even a fraction of a millimeter in diameter difference or a slight mismatch in thread pitch will prevent the screw from seating or, worse, destroy the internal threads of your expensive machinery.
This guide moves beyond simple ruler estimates. We will explore engineering-grade identification methods for both Imperial and Metric systems. You will learn how to read technical "callouts," why a caliper is your most valuable tool, and how to solve the common problem of identifying a screw that is already missing. By understanding the three variables of diameter, pitch, and length, you can source the exact replacement every time.
The "Callout" Formula: Machine screws are defined by three variables: Diameter, Thread Count/Pitch, and Length. Missing one leads to failure.
The Caliper Reality: Rulers are often insufficient for distinguishing between close sizes (e.g., M3 vs. #4). Digital calipers are the gold standard.
The Tolerance Trap: Real-world screws measure slightly smaller than their label (e.g., an M6 screw is rarely 6.00mm).
Head Geometry Matters: Length is measured based on how the screw sits in the surface, not necessarily the total physical length.
Before you pick up a measuring tool, you must understand the language of fasteners. Every machine screw follows a specific syntax known as a "callout." If you can read the callout, you know exactly what you hold in your hand. However, the grammar changes depending on whether the part is Imperial (Unified) or Metric (ISO).
In the Imperial system, used primarily in the United States, the callout follows this structure: Diameter - TPI x Length. For example, a label might read #10-24 x 1". The #10 represents the diameter (a gauge number), 24 indicates the Thread Count (Threads Per Inch), and 1" is the length. Missing the middle number is a common error; a #10-32 screw has the same diameter but will not fit a #10-24 hole.
The Metric system uses a slightly different logic: M(Diameter) x Pitch x Length. A typical example is M6 x 1.0 x 25. Here, M6 indicates a 6mm nominal diameter, 1.0 is the pitch (the physical distance between threads in millimeters), and 25 is the length in millimeters. Metric descriptions are often cleaner, but the pitch measurement requires careful attention.
How do you know which system to use before you start measuring? Look for visual cues on the screw head. Metric fasteners typically feature stamped numbers indicating their strength class, such as 8.8 or 10.9. If you see these numbers, put away your inch ruler; you are working with Metric. Imperial screws often use radial lines to denote strength (Grades). A screw head with three radial lines is a Grade 5 Imperial screw. If the head is plain with no markings, it could be either, but small plain screws in electronics are frequently Metric, while older domestic appliances often use Imperial.
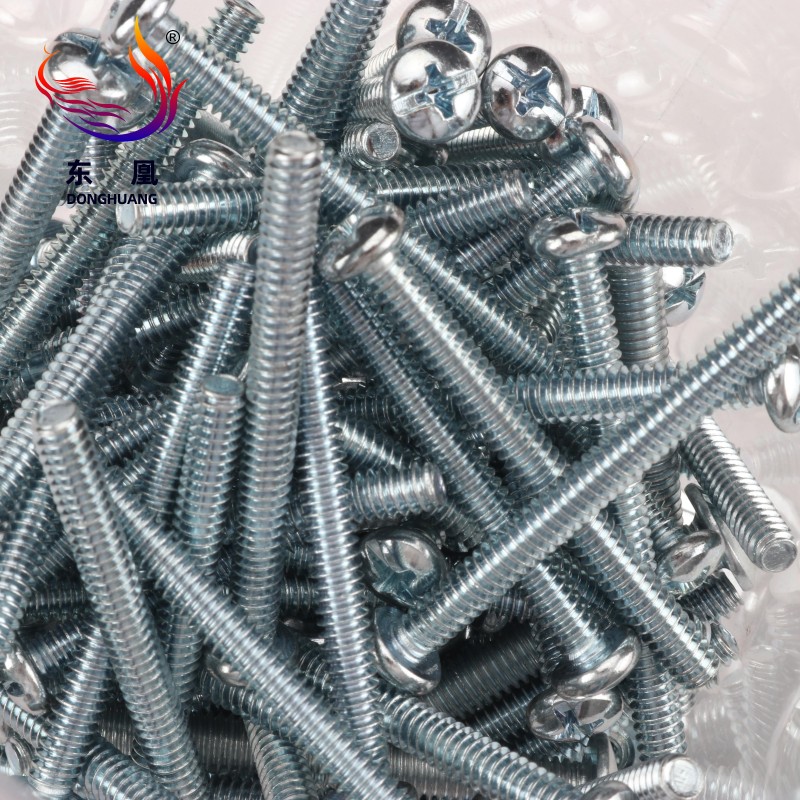
The diameter is the most critical dimension, yet it is the easiest to misinterpret due to manufacturing nuances. To get this right, you generally need a digital caliper. A ruler simply lacks the resolution to distinguish between a 3mm screw and a 1/8-inch screw.
You must measure the Major Diameter. This is the distance between the outer edges of the threads at their widest point. Place the screw between the caliper jaws and close them gently on the threaded portion. Do not measure the smooth shank unless it is wider than the threads, and definitely avoid measuring the very tip. Manufacturers often chamfer or taper the tip to help the screw enter the hole, meaning the tip diameter is significantly smaller than the actual size.
For Imperial screws larger than 1/4 inch, the diameter is stated in fractions (e.g., 3/8", 1/2"). However, smaller fasteners use a "Gauge" system ranging from #0 to #12. There is no simple math trick to calculate this in your head; you must rely on a conversion table or a machine screw size chart to translate caliper readings into gauge numbers.
Below is a reference for common small machine screws:
| Size (Gauge) | Decimal Diameter (Inch) | Decimal Diameter (mm approx) |
|---|---|---|
| #2 | 0.086" | 2.18 mm |
| #4 | 0.112" | 2.84 mm |
| #6 | 0.138" | 3.51 mm |
| #8 | 0.164" | 4.17 mm |
| #10 | 0.190" | 4.83 mm |
| #12 | 0.216" | 5.49 mm |
If your caliper reads 0.187 inches, it does not match exactly 0.190, but it is undoubtedly a #10 screw. This discrepancy leads us to the concept of tolerance.
Novices often panic when their measurements do not match the chart perfectly. They measure a screw labeled "M6" and find it is only 5.88mm wide. This is not a defect; it is a necessity. Screws are manufactured with a "minus tolerance." The screw must be slightly smaller than the nominal size to fit into a hole that is exactly that size. If an M6 screw measured exactly 6.00mm or slightly more, it would seize inside a 6.00mm nut. Therefore, expert insight dictates that an M6 screw typically measures between 5.85mm and 5.95mm. If you measure exactly the nominal number, you may have an over-plated or defective part.
Once you know the diameter, you must identify the threading. A 1/4-inch screw with coarse threads will not fit a hole tapped for fine threads, even though the diameters are identical. This step confirms the specific "series" of the fastener.
Imperial and Metric systems measure threading differently. Imperial uses TPI (Threads Per Inch), which is a count. You are literally counting how many thread peaks exist within a one-inch span. Metric uses Pitch, which is a distance measurement. You measure the physical gap between two adjacent thread peaks in millimeters. A machine screw size chart mm often lists these standard pitches (e.g., M6 is usually 1.0mm, M8 is 1.25mm).
Both systems offer "Coarse" and "Fine" thread options. Coarse threads are the industry default for general machinery because they assemble faster and are more resistant to damage. For example, 1/4"-20 is the standard coarse thread for that diameter, while 1/4"-28 is the fine version. If you are replacing a lost screw and have no evidence of the original, assume Coarse first. However, verifying is always safer.
The professional way to measure this is using a thread gauge—a tool that looks like a pocketknife with serrated metal leaves. You simply try different leaves against the screw threads until one meshes perfectly, blocking out all light. If you lack this tool, try the "Paper Impression" trick. Press the side of the screw firmly into a piece of paper or rubbing the side with a pencil tip to create a thread profile. You can then measure the distance between the marks on the flat paper using a ruler. Visually, coarse threads look deeper and steeper, while fine threads appear shallow and frequent.
Length seems straightforward, but it is the source of frequent ordering errors. The core principle of fastener measurement is that length represents the portion of the screw embedded in the material. This changes depending on the shape of the head.
Different heads sit differently on the surface. You must adapt your measurement technique to the head geometry:
Flat/Countersunk Heads: These screws are designed to sit flush with the surface. Because the head sinks into the material, it counts as part of the functional length. Measure the total physical length from the top of the flat head to the tip.
Pan, Round, or Hex Heads: These heads sit on top of the surface. The head itself does not contribute to the fastening depth. Measure from directly under the head to the tip.
Oval Heads (The Exception): Oval heads have a countersunk bottom but a raised, rounded top. For these, you measure from the widest point of the head (the transition ridge where the head meets the hole edge) to the tip. You do not include the rounded dome top.
Be aware of the distinction between machine screws and bolts regarding threading. Machine screws are typically fully threaded from tip to head. Bolts may be partially threaded, featuring a smooth shank near the head. If you use a partially threaded bolt in a shallow blind hole, the smooth shank might hit the threads before the head tightens down, leaving the part loose. Always verify if your application requires full threading.
A common business problem arises when a fastener shakes loose from a critical asset, like a laptop hinge or an industrial motor, and is lost. You are left with only a threaded hole. How do you find the right screw?
You cannot measure the "Major Diameter" of a hole directly because the threads are in the way. Instead, use the internal jaws of your caliper to measure the hole's inside diameter (ID). This is the Minor Diameter. The logic is simple: the ID is always smaller than the screw size. The formula generally is Screw Size ≈ Hole ID + Thread Depth. For example, if a hole measures approximately 5.0mm ID, it is likely tapped for an M6 screw (since M6 threads are roughly 1mm deep in total). If the hole measures 0.150 inches, it is likely a #10 screw (which is 0.190" outside).
If you have a collection of screws, you can test fit them, but you must mitigate risk. Never force a steel screw into an aluminum or brass hole. If it meets resistance immediately, stop; you likely have the wrong thread pitch. A safer method is to use a "screw checker"—a plastic or metal gauge plate with pre-threaded holes available at hardware stores. For critical components, test the thread pitch using a softer screw, such as one made of nylon or brass. These softer materials will deform if the pitch is wrong, protecting the valuable internal threads of your equipment.
Once you identify the size, you must choose the material. A generic steel screw might fit, but it might not last.
Galvanic corrosion occurs when dissimilar metals interact in the presence of moisture. Using a stainless steel screw on an aluminum panel can cause the aluminum to corrode and lock the screw in place (seizing). In these cases, you must apply an anti-seize compound or use a barrier washer. For high-vibration environments, consider using screws with a pre-applied nylon patch or using liquid thread-lockers to prevent loosening.
The strength of the replacement matters. In the Metric system, look for "8.8" (standard high strength) or "10.9" (alloy steel). Avoid unmarked bolts if the application is structural. In the Imperial system, a Grade 2 bolt is unmarked and made of low-carbon steel. A Grade 5 bolt has three radial lines on the head, and a Grade 8 bolt has six lines. While cheap, low-grade screws are attractive for the budget, the Total Cost of Ownership (TCO) skyrockets if the head shears off during installation, forcing you to drill it out.
Guessing screw sizes is a gamble where the odds are never in your favor. Accurate identification requires a systematic check of diameter (adjusting for tolerance), pitch (Imperial TPI vs. Metric distance), and head-specific length. Remember that "close enough" usually results in stripped threads and compromised connections.
When in doubt, invest in a simple thread pitch gauge or take the mating part to a local hardware store. The cost of a proper measurement tool is far lower than the cost of retapping a hole or replacing a damaged component. By following the protocols outlined above, you ensure professional results and mechanical integrity for every project.
A: Check the head markings first. Metric screws often have numbers (8.8, 10.9) indicating strength class. Standard (Imperial) screws often use radial lines (3 lines for Grade 5, 6 lines for Grade 8). If unmarked, measure the diameter. Metric sizes are usually clean millimeters (3mm, 4mm), whereas Imperial sizes will match fractions or Gauge numbers (e.g., #6 is 0.138"). If a nut threads on halfway and stops, you have mismatched the systems.
A: This is due to manufacturing tolerance. Screws are made with a "minus tolerance" to ensure they fit into a hole that is exactly the nominal size. An M6 screw typically measures between 5.85mm and 5.95mm. If it were exactly 6.00mm or larger, it would likely bind or seize during installation. This slight undersizing is intentional and standard across the industry.
A: "M6" refers only to the diameter of the screw (6mm). "M6-1.0" specifies both the diameter (6mm) and the thread pitch (1.0mm per thread). While 1.0mm is the standard coarse pitch for M6, there are also fine pitch versions like M6-0.75. Specifying the pitch ensures you buy a screw that will actually thread into your specific nut or tapped hole.
A: For diameter, lay the screw on a ruler and align the threads carefully; use a conversion chart to match the approximate width to a Gauge number (e.g., slightly over 1/8" is likely a #6). For pitch, press the screw sideways into a piece of paper to create an impression. Measure the distance between the marks. If 10 marks span 1/2 inch, it is likely 20 TPI. This method is an estimate and not recommended for critical machinery.
A: It depends on the head type. For flat (countersunk) heads, yes, the length includes the head because it sits flush with the material surface. For pan, round, hex, or socket heads, no, you measure from directly underneath the head to the tip of the screw. The rule is to measure only the part of the screw that actually enters the material.


