
Views: 0 Author: Site Editor Publish Time: 2026-06-27 Origin: Site
Modern manufacturing constantly faces a highly specific, persistent challenge. Engineers desperately need robust, load-bearing threads in materials too thin for standard tapping. This physical constraint becomes exponentially harder when access is restricted to just one side of an assembly. Enter blind threaded inserts. They are mechanically engineered to solve this exact bottleneck. These fasteners serve as a highly effective mechanical alternative to traditional weld nuts and prone-to-stripping tapped holes. They create a permanent, reusable thread where other methods fail.
This guide goes far beyond basic textbook definitions. We will evaluate critical structural variations and assess application viability across different demanding industries. You will also learn about the specific tooling requirements necessary for reliable production or fast-paced fabrication environments. Read on to master the selection and application process.
Alternative fastening methods often carry hidden manufacturing limitations. Tapping thin metal presents a massive headache on the assembly line. Threads need sufficient material depth to hold torque. Traditional tapping typically fails in materials under 0.030 inches thick. You simply cannot achieve adequate thread engagement. You risk stripping the hole entirely during final assembly. This compromises the entire structural joint.
Blind access creates another significant physical barrier. Sometimes you cannot reach the back side of a panel. Square tubing and closed extrusions present similar hurdles. Reaching behind the surface becomes physically impossible. You need a fastener capable of one-sided installation.
Welding offers another common alternative. However, welding introduces severe inefficiencies. The process creates heat-affected zones. It produces unsightly weld spatter. Operators face exposure to toxic fumes on the shop floor. Furthermore, you must complete all welding before painting. Otherwise, the intense heat destroys your protective finish.
Here is where Rivet Nuts shine. They solve these precise structural challenges permanently. You can install them after painting or powder coating. They leave the surrounding finish completely pristine. You eliminate hot work requirements entirely.
Different industries leverage these fasteners to solve unique engineering constraints. They provide versatile solutions across varied manufacturing environments.
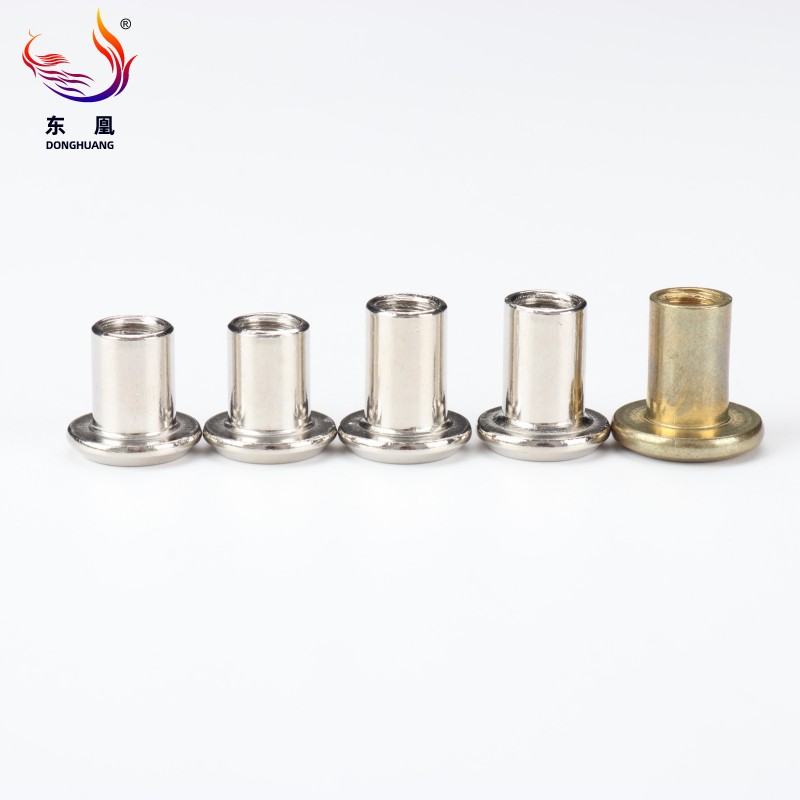
Selecting the right fastener requires understanding specific engineering requirements. You must break down the available solution categories carefully.
The body style dictates how well the fastener resists rotational forces.
The smooth body represents the standard, cost-effective option. It works best for light-duty static loads. However, it offers minimal resistance to spinning.
The splined or knurled body features a textured exterior. It bites aggressively into softer host materials. It works exceptionally well in aluminum or plastics. This texture provides significantly higher rotational resistance.
The hex or half-hex body provides the ultimate resistance to torque. It completely prevents spin-out failures. However, it requires a specialized laser-cut or punched hex hole for installation.
Head types determine the final physical profile of your assembly.
The flat head offers the highest push-out strength available. It creates a large bearing surface. However, it sits noticeably proud of the material surface.
The reduced or low-profile head offers a great compromise. It sits nearly flush against the panel. Crucially, it achieves this without requiring a specialized countersink tool.
The countersunk head provides a perfectly flush finish. The mating component sits entirely flat. However, you must pre-chamfer the host material beforehand.
You must evaluate tensile and shear strength trade-offs during selection. Different environments demand specific material properties.
| Material Type | Weight / Hardness | Corrosion Resistance | Compression Difficulty |
|---|---|---|---|
| Aluminum | Lightweight, very soft | Good (Naturally forms oxide layer) | Very easy to compress manually |
| Zinc-Plated Steel | Moderate weight, strong | Fair (Relies on plating integrity) | Requires moderate tool force |
| Stainless Steel | Heavy, extremely hard | Excellent (Best for marine/outdoor) | Requires heavy-duty pneumatic tools |
Understanding the mechanical deformation process is crucial for successful assembly. The "aha" moment happens when you realize how the fastener secures itself.
The installation follows a specific sequential process:
Successful implementation heavily depends on your chosen tooling options. You must balance anticipated production volume against equipment availability.
Manual hand tools carry a very low upfront barrier to entry. They remain ideal for rapid prototyping or field repairs. They work well for low-volume production runs. However, they cause high physical fatigue during continuous use.
Pneumatic spin-pull tools require specialized shop air infrastructure. They represent a much larger initial investment. However, they prove essential for high-volume manufacturing. They deliver perfectly consistent compression force every single time.
Battery-powered tools offer maximum mobility on job sites. They carry a moderate-to-high initial expense. They work best for large-scale field installations. Solar racking teams rely heavily on these portable units.
We must acknowledge some transparent assumptions and skeptical truths. These fasteners remain highly effective when specified correctly. However, they carry specific points of failure if improperly managed.
The "spin-out" threat represents the most common assembly nightmare. Operators sometimes over-torque the mating bolt. This breaks the friction seal. The fastener begins to spin freely in its hole. A spinning insert becomes nearly impossible to remove normally. We highly recommend specifying hex bodies to permanently mitigate this risk.
Grip range mismatch destroys structural integrity instantly. Every fastener specifies a strict material thickness range. Using an insert outside this defined window spells disaster. Too thin, and you get a loose, rattling fit. Too thick, and the tool crushes the host material entirely.
Galvanic corrosion destroys joints quietly over time. This happens when dissimilar metals interact. Installing carbon steel hardware into raw aluminum panels invites trouble. Moisture accelerates this destructive chemical reaction. You must prioritize proper material matching for outdoor environments.
| Observed Failure Mode | Primary Root Cause | Engineering Mitigation |
|---|---|---|
| Spinning in place during bolt insertion | Over-torquing or oversized pilot hole | Use hex body style; verify precise hole tolerances |
| Fastener rattles after installation | Grip range is too large for the panel | Select an insert with a smaller, matched grip range |
| Panel warping around the hole | Tool pull force set too high for material | Calibrate pneumatic tool pressure; use load-bearing flat heads |
| Rapid rusting at the joint | Galvanic reaction between mismatched metals | Match materials (e.g., aluminum insert for aluminum panel) |
You need a systematic approach to finalize your hardware selection. Guesswork leads to costly manufacturing delays.
First, determine your exact material thickness. You must measure the panel precisely using digital calipers. This measurement strictly dictates your required grip range. Never eyeball panel thickness.
Next, assess your load and torque requirements carefully. Match your expected pull-out force with the appropriate body style. High-vibration environments demand splined or hex variations. Heavy loads require high-tensile steel over soft aluminum.
Then, audit your available shop floor tooling. Ensure your current equipment handles the selected Rivet Nuts properly. Hard materials like stainless steel demand immense compression force. Manual tools often fail to compress stainless steel variants correctly.
Finally, always request samples for physical pilot testing. We strongly recommend performing destructive testing firsthand. Test them on exact scrap material samples. Confirm the pull-out strength before integrating them into a final production run.
Blind threaded inserts are not merely obscure specialty hardware. They stand as foundational elements for modern fabrication. They make efficient sheet metal and tubular assembly possible. They eliminate the physical barriers of one-sided access.
Successful implementation requires bridging two critical elements. You must pair the right fastener variation with the correct installation tooling. Choosing a hex body eliminates spin-outs. Matching your grip range ensures joint rigidity. Upgrading to pneumatic tools guarantees production consistency.
Your next step involves measuring your host material precisely. Audit your current shop tools for compatibility. Then, request physical samples to validate your engineering assumptions.
A: No, they are designed as permanent fixtures. Once collapsed, they lock tightly into the material. Removing them requires carefully drilling out the flange head. You then push the remaining shank through the back of the hole. This process differs entirely from removing standard removable nuts.
A: Weld nuts typically handle extreme structural shear forces better. A solid weld fuses the metals together permanently. However, threaded inserts hold standard assembly loads perfectly well. They easily meet the torque specifications required for most automotive, aerospace, and general manufacturing applications without the heat distortion of welding.
A: The required hole size depends entirely on the specific manufacturer's spec sheet. Tolerances remain extremely strict. Guessing hole sizes routinely leads to disastrous spin-outs. Always consult the technical data sheet for the exact drill bit or punch size corresponding to your chosen thread size and body style.
A: You can use a DIY method involving a bolt, a nut, and a washer. By tightening the nut against the washer, you crush the insert. This works fine for one-off emergencies or quick field repairs. However, it remains completely unacceptable for achieving commercial reliability or consistent production volumes.

