
Views: 0 Author: Site Editor Publish Time: 2026-06-27 Origin: Site
You have a project requiring blind threaded inserts. Staring at specialized installation equipment might make you wonder if a workaround exists. Internet forums are full of DIY hacks. Van conversion enthusiasts and hot rod builders frequently claim you can bypass proper equipment using basic garage hardware. Can you really install them without a dedicated setter? Yes, you can. You can install a blind insert using a simple bolt-and-nut friction rig. However, deciding whether you should attempt this depends on several crucial factors.
Your overall project volume dictates the best approach. Material hardness plays a massive role in installation success. You must also evaluate your personal tolerance for panel-ruining mistakes. Professional fabricators rely on dedicated tools for a very specific reason. Improvised setups carry unique and frustrating risks. In this guide, we will explore exactly how the DIY method functions. We will examine the hidden dangers of bypassing proper equipment. You will learn precisely when to use a temporary hack and when a specialized tool becomes absolutely essential for your project's success.
We can validate your initial research immediately. The classic bolt-and-washer homemade method does function. Many builders successfully use this hack for minor repairs. You can successfully compress an insert using standard garage hardware. However, understanding the underlying mechanics reveals why this remains a secondary option.
A blind fastener requires strict linear compression to function properly. You apply pulling force directly to the internal threads. The knurled outer body then collapses against the hidden backside of your panel. This mechanical deformation creates a secure, permanent anchor point. Dedicated equipment achieves this by pulling the mandrel straight back. The tool isolates the rotational force from the fastener itself.
You should define narrow criteria before attempting an improvised installation. The homemade hack makes sense under very specific conditions. We recommend it only for extremely low-stakes applications. If you only need to install one or two soft aluminum inserts, a homemade rig serves adequately. It provides a viable path when you absolutely cannot source specialized gear immediately. You must simply accept the increased manual labor and elevated risk.
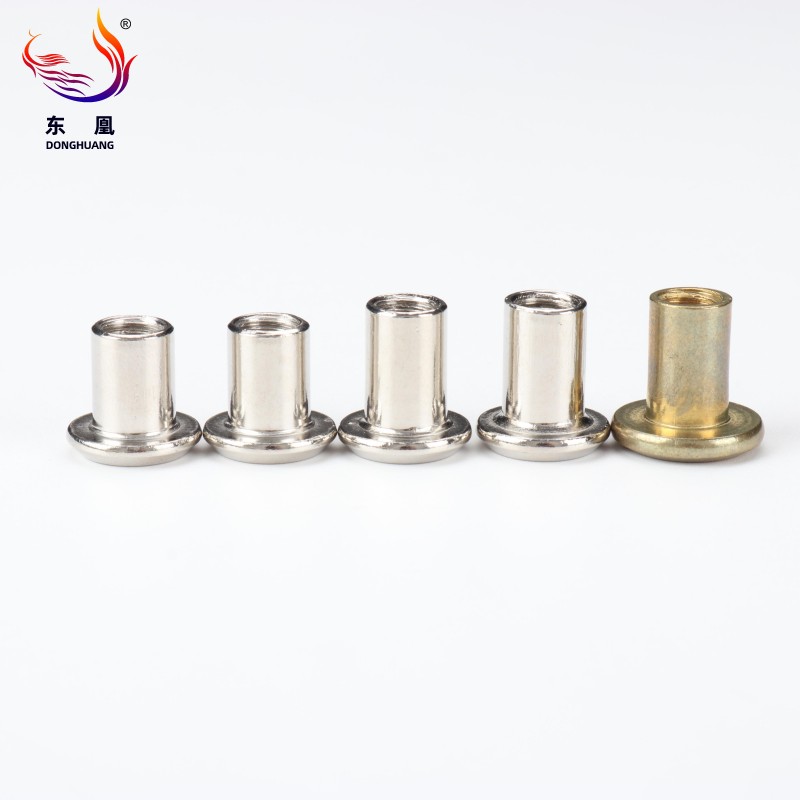
Let us break down the exact components of a homemade installation rig. You need specific, high-strength hardware to create enough friction and linear force. Standard structural bolts will often shear under the required pressure. You must gather the correct bill of materials before beginning.
You must assemble these components in a specific order to mimic a proper setter. Follow this sequence carefully to ensure maximum control over the compression phase.
As you tighten the bolt, the insert begins to collapse behind the panel. You will feel steadily increasing physical resistance. This method requires intense concentration and mechanical sympathy. You must rely entirely on tactile feedback. You have to judge the precise moment the fastener seats perfectly. Professional gear provides a definitive mechanical hard stop. The DIY method relies purely on muscle memory and guesswork. If you pull too far, you strip the threads. If you stop early, the anchor remains dangerously loose.
Evaluating the risk versus reward ratio is critical. Improvised setups introduce severe vulnerabilities into your fabrication process. You must understand how these failures occur before modifying expensive workpieces.
Uneven rotational torque creates massive structural problems. Improvised tools easily twist the fastener inside your drilled hole. We call this catastrophic failure "spin-out." A spinning fastener in thin sheet metal creates a true fabrication nightmare. You cannot easily drill it out because the insert simply spins along the drill bit. Builders often ruin the surrounding panel trying to extract a botched insert. Proper setters pull straight back, preventing this rotational sheer stress entirely.
Improvised tools inherently introduce off-axis stress. You apply heavy rotational force using manual hand wrenches. Your hands naturally sway and move off the center axis. This lateral movement damages the delicate internal threads of your anchor. Once you strip those internal threads, the anchor becomes completely useless. You cannot thread your final mounting bolt into a stripped insert. This forces you into a complex extraction process.
Harder materials demand massive, consistent upsetting force. You cannot easily compress steel or stainless steel using a simple hand wrench. You will almost certainly fail to achieve the required upset load. The anchor will remain partially collapsed and loose. A loose fastener eventually fails entirely under normal environmental vibration. This compromises your final mounting point and creates safety hazards.
Certain project criteria mandate the use of professional equipment. You must evaluate your specific business or project success requirements. Relying on improvised hacks for complex builds guarantees frustration and compromised quality.
Consider your overall project scale carefully. A comprehensive van build often requires dozens of interior attachment points. Installing a single fastener using the DIY hack takes roughly five minutes of strenuous effort. You will sweat, struggle, and fatigue your hands. A proper setter takes exactly five seconds per hole. You simply squeeze the handles and move to the next location. The sheer physical energy savings justify acquiring the correct equipment immediately.
Material selection dictates your required installation method. Soft aluminum yields easily under minimal pressure. You can reliably compress aluminum using simple hand tools. However, steel and stainless steel components possess high yield strengths. They require intense mechanical advantage to collapse properly. Specialized manual tools utilize internal linkages to multiply your grip force exponentially. You cannot safely replicate this necessary mechanical advantage using basic wrenches.
Professional applications demand perfectly uniform grip ranges. Specialized gear ensures every single anchor compresses equally across the entire panel. This guarantees consistent pull-out strength for your mounted components. Furthermore, slipping wrenches frequently destroy painted surfaces or clear coats. A dedicated setter protects your finished workpiece from accidental scratches and impact damage. Precision ensures your final product looks professional and functions flawlessly.
You must match your installation equipment to your project scope. Several distinct categories of setters exist on the market. Understanding their unique capabilities helps you shortlist the perfect solution for your workshop.
These compact setters resemble standard pop-rivet guns. They work beautifully in tight, restricted spaces. You use them primarily for small-diameter, soft-metal fasteners. They possess a low barrier to entry for casual users. However, they rely entirely on your raw grip strength. You will struggle to set steel inserts using a plier-style mechanism.
These robust setters feature long tubular arms for two-handed operation. They represent the absolute sweet spot for serious DIYers and light fabricators. They offer tremendous mechanical advantage. You can easily compress medium-diameter steel inserts. They provide excellent leverage while remaining highly portable around the workshop.
Pneumatic setters represent the undisputed industrial standard. They use compressed workshop air to perform a rapid spin-pull-spin action. The tool automatically threads the insert, pulls it to a calibrated pressure, and reverses out. They guarantee perfectly uniform compression every single time. They suit high-volume fabrication shops perfectly. They require a dedicated air compressor infrastructure.
Battery-powered options provide ultimate untethered mobility. They work perfectly for remote field repairs. You can move freely around large vehicles without dragging a heavy air hose. They deliver the consistent power of pneumatics combined with modern battery convenience. They represent the premier choice for large-scale mobile conversion projects.
| Tool Category | Best Application | Material Capability | Mechanical Advantage |
|---|---|---|---|
| Plier-Style | Tight spaces, occasional use | Aluminum, thin steel | Low (relies on grip strength) |
| Lever-Style | General fabrication, automotive | Aluminum, Steel, Light Stainless | High (two-handed leverage) |
| Pneumatic | Industrial manufacturing, high volume | All materials, thick stainless | Maximum (calibrated air pressure) |
| Cordless | Field repairs, mobile builds | All materials | Maximum (electric motor torque) |
Evaluating your next action steps requires focusing on reliability and project integrity. The consequences of failure far exceed the effort required to source reliable gear. You must prioritize the safety and security of your assembled components.
Think about the intense labor required to fix a botched installation. You will spend hours painstakingly drilling out a spinning fastener. You might permanently damage a highly visible vehicle body panel. Compare this immense frustration against utilizing a reliable lever-style setter. Proper equipment prevents these cascading project delays. Securing the right gear protects your time, your materials, and your peace of mind.
You must actively match your equipment to your fastener specifications. Heavy-duty structural inserts require significant upsetting force to achieve their rated strength. You must plan for the correct setting equipment when mapping out your project materials. Do not treat the installation method as a mere afterthought. If your design specifies robust Rivet Nuts, you must secure the mechanical leverage required to seat them properly.
Assess your complete fastener list immediately. Note the specific thread sizes, material types, and total quantities required. If your list exceeds a handful of soft inserts, abandon the improvised hack. Explore a curated selection of reliable manual or pneumatic setters. Choose highly versatile equipment offering interchangeable mandrels. This ensures your chosen setter can adapt to future projects requiring different thread sizes.
The DIY bolt-and-washer trick remains a functionally valid emergency backup. We acknowledge its utility for isolated, low-stakes repairs. However, it relies heavily on unstable rotational friction rather than precise linear pulling. This inherent flaw introduces completely unnecessary risks to your expensive workpieces. You drastically increase the probability of spin-outs and stripped threads.
For anything beyond a small handful of soft aluminum inserts, you need proper equipment. Attempting to tackle a major fabrication project using hand wrenches guarantees fatigue and poor results. Acquiring a dedicated installation setter represents a direct investment in project security, rapid installation speed, and your own sanity.
Review your exact project requirements today. Evaluate the material hardness and total volume of your intended anchor points. Direct your attention to dedicated product category pages for quality fasteners and matching gear. Select a comprehensive guide to match the right setter mechanism to your specific thread sizes. Doing so ensures your final assembly remains robust, secure, and professional.
A: You should never use a standard impact driver directly on these fasteners. The violent percussive force instantly strips the delicate internal threads. It also frequently causes the insert to spin out inside the panel. You can only use an impact driver if you attach a specialized, commercially available impact-driven adapter designed explicitly for this purpose.
A: A spinning insert requires careful extraction. You must wedge a thin flathead screwdriver under the flange to stop the rotation. Carefully drill through the center flange using a slightly oversized bit until the head separates. Push the remaining body into the panel cavity. Proper installation tools prevent this headache entirely.
A: Yes. Aluminum possesses a significantly lower yield strength. This lower strength allows the knurled body to collapse under the limited friction provided by hand wrenches. Because of this, aluminum remains the only truly viable material candidate for improvised DIY installation hacks.
A: Yes. Most high-quality manual and pneumatic setters feature easily swappable nosepieces and internal mandrels. This modularity allows a single tool body to install both metric and SAE thread sizes. Always ensure you match the exact mandrel thread pitch to your specific fastener before applying compression.

